
One of the biggest frustrations for car owners is the appearance of swirl marks and fine scratches on their vehicle’s paintwork. These imperfections can detract from the overall aesthetics of the car, making it look dull and neglected. However, with the right approach and the use of effective polishing compounds, you can restore your car’s finish and achieve a smooth and flawless surface. In this guide, we will walk you through the process of removing swirl marks and fine scratches with polishing compounds. From understanding the causes of these imperfections to selecting the right products and following the proper techniques, we’ve got you covered. Let’s get started and bring back the shine to your beloved vehicle.
Understanding Swirl Marks and Fine Scratches
Swirl marks are circular or spiral-shaped micro-scratches that typically appear on a car’s paint surface. They are often caused by improper washing techniques, using abrasive materials, or even dust particles that get trapped between the car’s surface and the cleaning tools. Fine scratches, on the other hand, are shallow marks that can result from various factors such as accidental contact with sharp objects or improper drying methods. Both swirl marks and fine scratches can be unsightly, but the good news is that they can be effectively treated with polishing compounds.
Selecting the Right Polishing Compounds
Choosing the right polishing compound is crucial for achieving the best results in removing swirl marks and fine scratches. Here are a few factors to consider:
Abrasive Level:
Different polishing compounds come with varying levels of abrasiveness. For light swirl marks and fine scratches, opt for a mild or medium abrasive compound. For deeper scratches, a more aggressive compound may be required. Consider the severity of the imperfections and choose a compound accordingly.
Compatibility:
Ensure that the polishing compound is compatible with the type of paint and clear coat on your vehicle. Some compounds are designed specifically for certain paint finishes, so read the product descriptions and labels carefully.
User-Friendliness:
Look for polishing compounds that are easy to work with, have a smooth consistency, and provide a good working time. This will make the application and removal process more manageable, especially for beginners.
Here are some of our favorites to use when working on client vehicles. We typically assess the vehicle and what is needed (deep scratches, swirls, etc.) then we choose the right compound/polish to tackle the job. For an enthusiast detailer, we have two different compounds that we recommend, Meguiar’s Ultimate Compound and 3D One Car Compound.
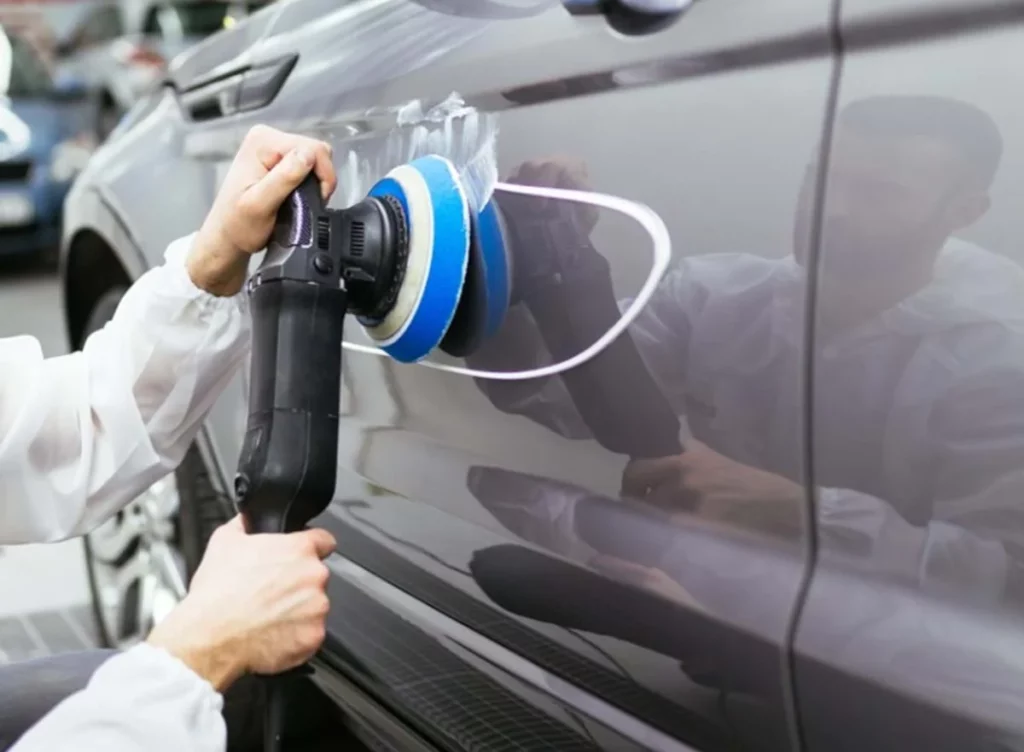
The Polishing Process
Before you begin the polishing process, it’s crucial to prepare your vehicle properly. Wash the car thoroughly to remove any dirt or debris that could further scratch the paintwork. Once the car is clean and dry, follow these steps to remove swirl marks and fine scratches:
Test an inconspicuous area:
Before applying the polishing compound to the entire surface, test it on a small and inconspicuous area of the car to ensure compatibility and to assess the results.
Apply the polishing compound:
Apply a small amount of the polishing compound onto a clean and soft applicator pad or microfiber cloth. Work on one section at a time, applying gentle pressure in circular motions.
Work in small areas:
Focus on a small area, typically about 1-2 square feet, and work the polishing compound into the paint surface using a dual-action polisher or by hand. Keep the pad or cloth moving at a steady pace to avoid heat buildup.
Monitor the progress:
As you work the polishing compound into the paint, monitor the progress closely. Swirl marks and fine scratches should begin to diminish, and the paint surface will start to regain its clarity and shine. Adjust the pressure and speed as needed for different areas of the car.
Wipe off residue:
After polishing a section, wipe off the excess residue using a clean microfiber cloth. Inspect the area to ensure the imperfections have been properly addressed. If necessary, repeat the process until satisfactory results are achieved.
Follow up with a finishing polish:
Once the swirl marks and fine scratches are significantly reduced or removed, follow up with a finishing polish to enhance the gloss and refine the paintwork further. This step helps to achieve a smooth and flawless finish.
Protect the paintwork:
After completing the polishing process, it’s important to protect the paintwork. Apply a layer of wax or sealant to provide a barrier against environmental elements and to maintain the restored shine for a longer period.
Removing swirl marks and fine scratches from your car’s paintwork is possible with the right tools and techniques. By selecting the appropriate polishing compounds, understanding the process, and taking your time, you can achieve remarkable results. Remember to always test on a small area first, work in small sections, and monitor your progress. With patience and care, you can restore the shine and bring back the luster to your vehicle’s paint surface.