
Faded and yellowed headlights not only affect the aesthetics of your car but also compromise your safety on the road. Over time, exposure to UV rays, environmental pollutants, and harsh weather can cause headlights to lose their clarity and brightness. Fortunately, headlight restoration is a straightforward process that can make a significant difference in both the appearance and functionality of your headlights. In this comprehensive guide, we will explore the best products and techniques for restoring faded headlights. Whether you’re a DIY enthusiast or seeking professional help, these tips will help you achieve crystal-clear headlights and ensure a safer driving experience.
Understanding Headlight Fading
Before we embark on the journey of headlight restoration, it’s crucial to understand the root cause of headlight fading. Headlight lenses are typically made of plastic or polycarbonate, and these materials are susceptible to damage from external elements. UV radiation from the sun, oxidation, and environmental contaminants, such as road debris and chemicals, gradually break down the protective layer of the headlight lens.
As the protective layer deteriorates, the headlight lens becomes discolored, foggy, and less transparent. This phenomenon is commonly known as headlight fading. The consequence of fading is diminished light output, which can reduce visibility at night and during adverse weather conditions.
The Importance of Headlight Restoration
Headlight restoration is not merely a cosmetic endeavor; it is a critical step for maintaining road safety. Clear and bright headlights are essential for providing adequate illumination on the road, making it easier for drivers to see and be seen by other motorists. Here are the key reasons why headlight restoration is of utmost importance:
- Enhanced Visibility: Restored headlights ensure that the road ahead is well-illuminated, allowing you to spot potential hazards and obstacles in low-light conditions.
- Improved Safety: Properly restored headlights make your vehicle more visible to other drivers, reducing the risk of accidents, especially during nighttime or inclement weather.
- Cost-Effectiveness: Headlight restoration is a cost-effective alternative to replacing the entire headlight assembly, saving you money while achieving comparable results.
Selecting the Right Headlight Restoration Products
To successfully restore your headlights, you’ll need the right products to get the job done effectively. When choosing headlight restoration products, consider the following essential items:
- Headlight Restoration Kit: A quality headlight restoration kit typically includes abrasive pads or sandpaper of varying grits, a polishing compound, and a protective UV sealant.
- Masking Tape or Painter’s Tape: To protect the surrounding areas of the headlight during the restoration process, use masking tape or painter’s tape.
- Microfiber Towels: Soft and lint-free microfiber towels are essential for applying and buffing the polishing compound and sealant.
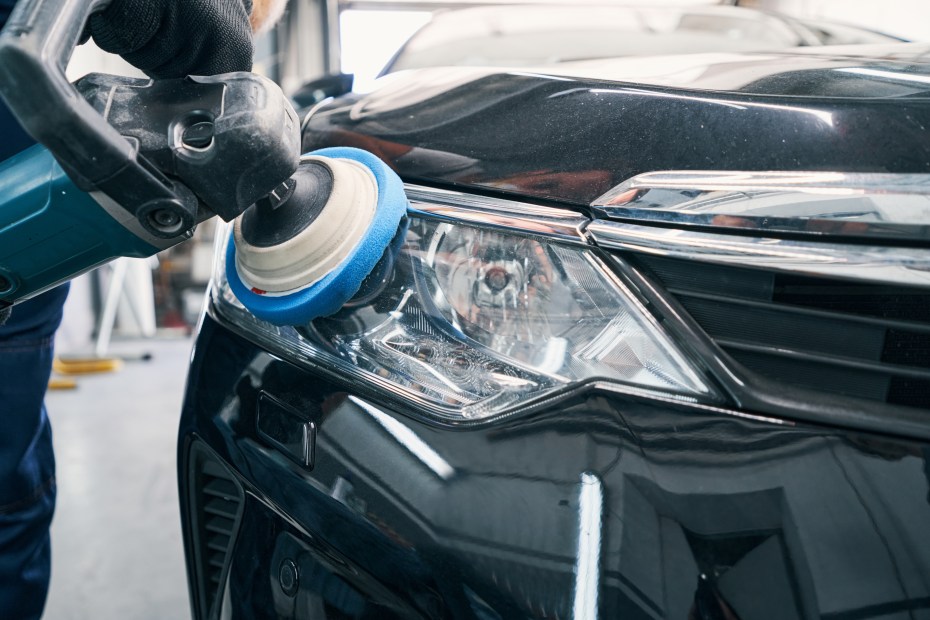
- Electric or Handheld Polisher (Optional): For more significant headlight restoration projects, an electric or handheld polisher can speed up the process and deliver consistent results.
“Explore top-rated headlight restoration kits to get started on restoring your headlights.”
Headlight Restoration Techniques
While headlight restoration might seem intimidating, it is a manageable task with the right techniques. Here’s a step-by-step guide to achieving professional-level results:
- Preparing the Headlight: Start by thoroughly cleaning the headlight surface to remove any dirt, grime, and debris. This step ensures better adhesion of restoration products.
- Wet Sanding: Use the abrasive pads or sandpaper provided in the restoration kit to wet sand the headlight lens gently. This process helps remove the oxidized layer and restores clarity to the lens.
- Polishing: Apply the polishing compound to the headlight and use a soft cloth or buffer to remove any remaining haze and fine scratches. The polishing process further enhances the lens’s clarity.
- Sealing: After completing the polishing step, apply the UV protective sealant to the headlight to safeguard against future fading and maintain the lens’s transparency.
Pro Tip: It’s crucial to follow the instructions provided in the restoration kit and work in small, controlled sections to achieve uniform results.
“Discover professional tips and techniques for achieving flawless headlight restoration.”
Restoring faded headlights is a transformative process that enhances the appearance and safety of your vehicle. By understanding the causes of headlight fading and recognizing the importance of restoration, you can take proactive measures to maintain optimal visibility on the road. The right selection of headlight restoration products and proper techniques will enable you to achieve crystal-clear headlights that illuminate your path with confidence.
Whether you choose to embark on a DIY headlight restoration project or seek professional assistance, this guide equips you with the knowledge and tools necessary for success. Don’t let faded headlights compromise your safety and driving experience. Embrace the headlight restoration process, and enjoy the benefits of clear and dazzling headlights that elevate your vehicle’s appearance and road visibility. With restored headlights, you can confidently navigate any journey with clarity and peace of mind.